Publishing Media
From the Studios page, go to the Action dropdown and select Publish media.

When you’re in the publishing flow, the Previous and Next buttons will bring you between stages of the process.
Select Media
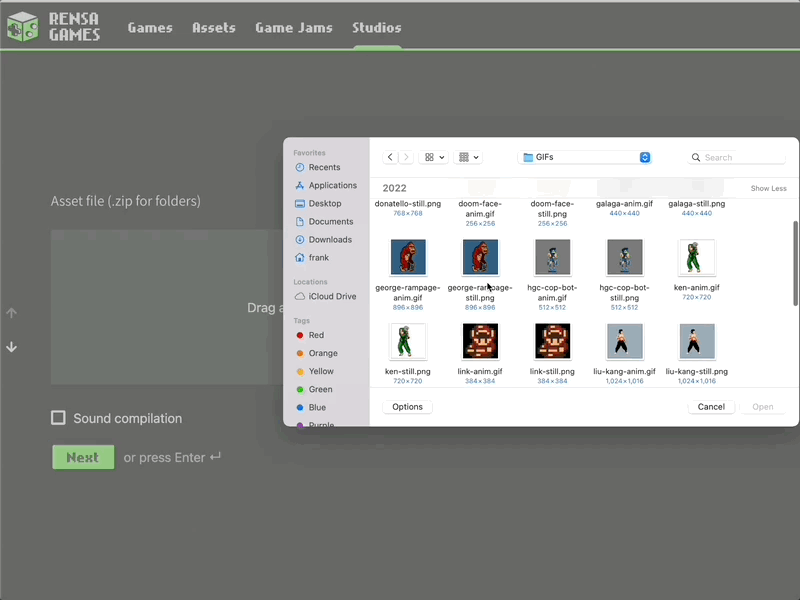
The first step in the publishing process is uploading the media asset itself. Use the file browser or drag the file into the upload box.
Preview Image
After you’ve uploaded the asset itself, you’ll be prompted to add a still preview or cover art.
Files can be .png or .jpeg.
You can also add an optional animated preview for items like sprite sheets and animations.
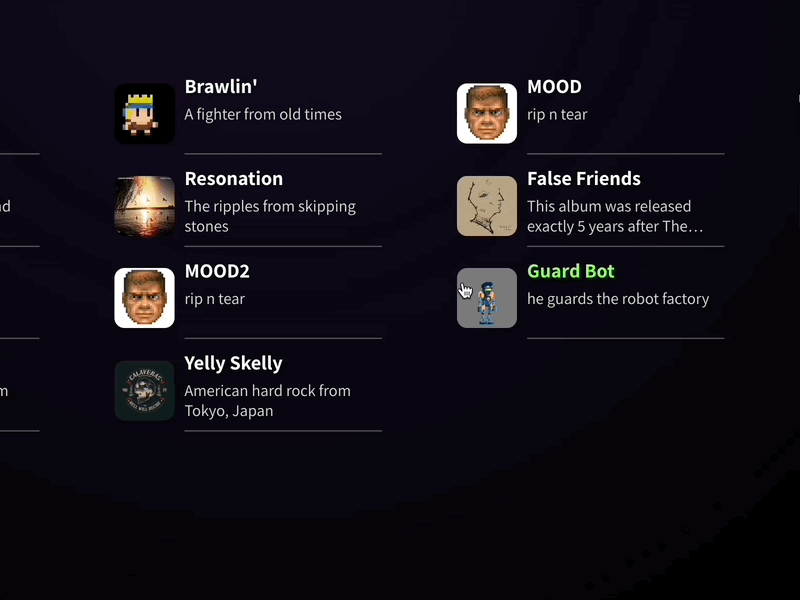
This will be played when the media is moused over in the marketplace (shown below).
Files can be .gif.
Metadata
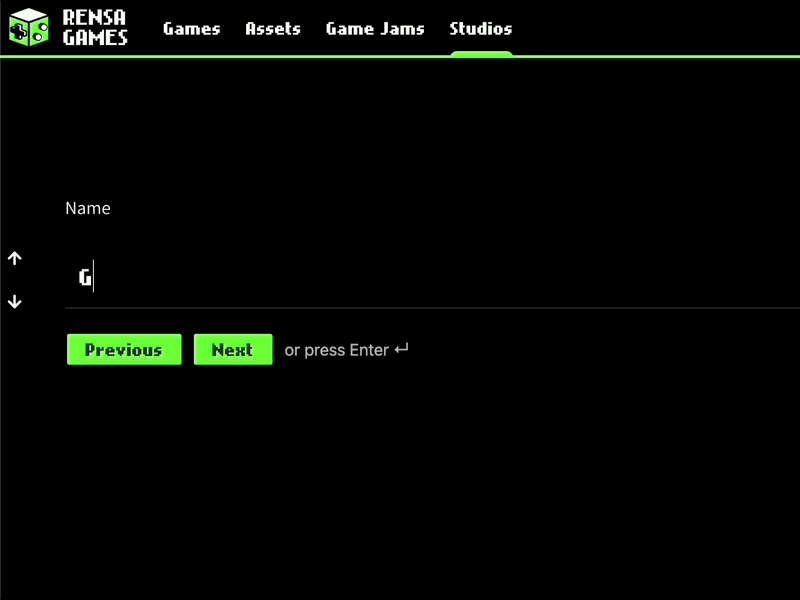
The next step is to input metadata about the media.
Type in the name of the media, the name of the creator, and a description, and then move on to the tagging step.
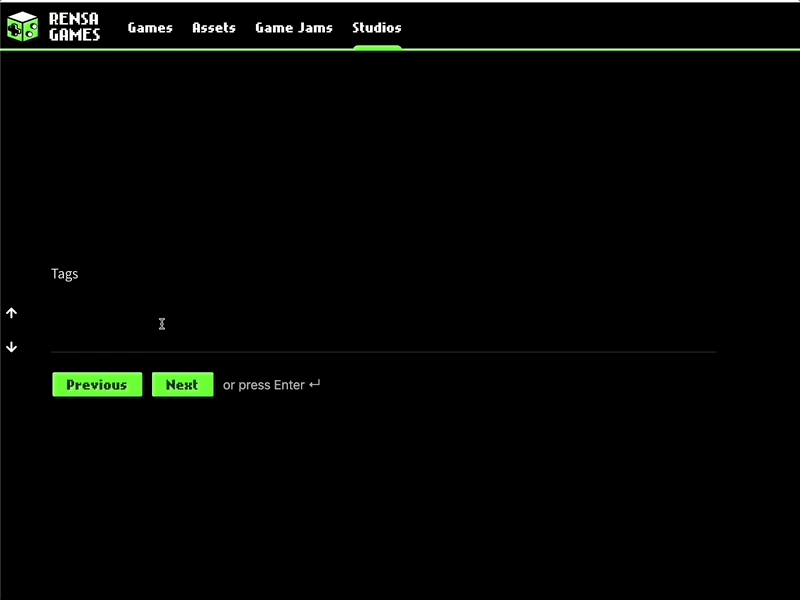
Tagging
You can also add categories and tags to the media metadata to improve searchability and indexing.
You can select one or more classification categories for the media by clicking on them. Click on them again to deselect them.
After picking categories, you can enter tags for your media (for example: “sprite,” “warrior,” “sword”).
If you want to create a mutiple-word tag, connect them with a hyphen (For example: "rail-shooter").
Use lower-case letters for these entries.
Type in your tags and then press Space to enter them.
To remove tags, click on the one you want to remove and press Delete or Backspace.
Licensing
Enter the number of licenses you want to have available for your media. These can be limited or functionally unlimited (the Infinite button mints 1BN license tokens). Note that there is no cost to minting more tokens, both in terms of gas paid to the network and energy use.
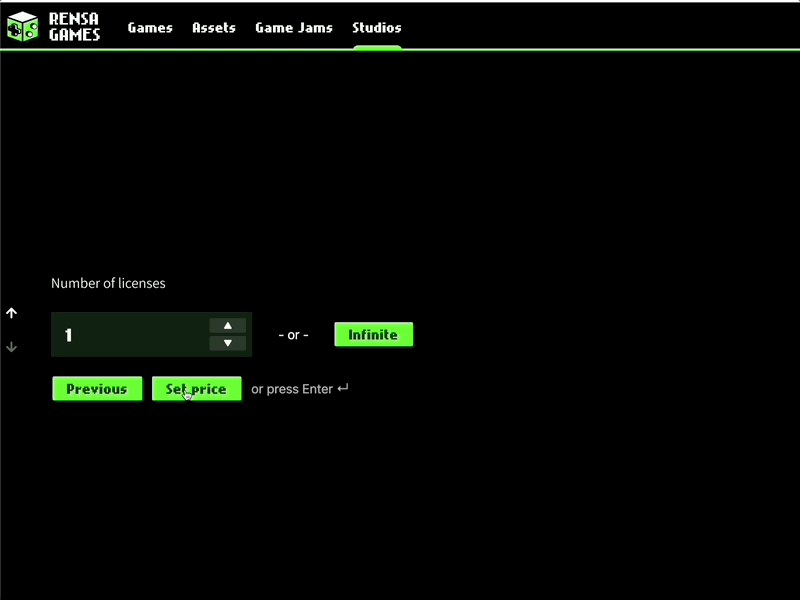
If you click Infinite and want to go back to limited, just click the down arrow to bring a number back into the pane and then enter the number you want.
When you’ve entered the number of licenses you want to mint, click Next. This will bring you to a new window.
Set Price
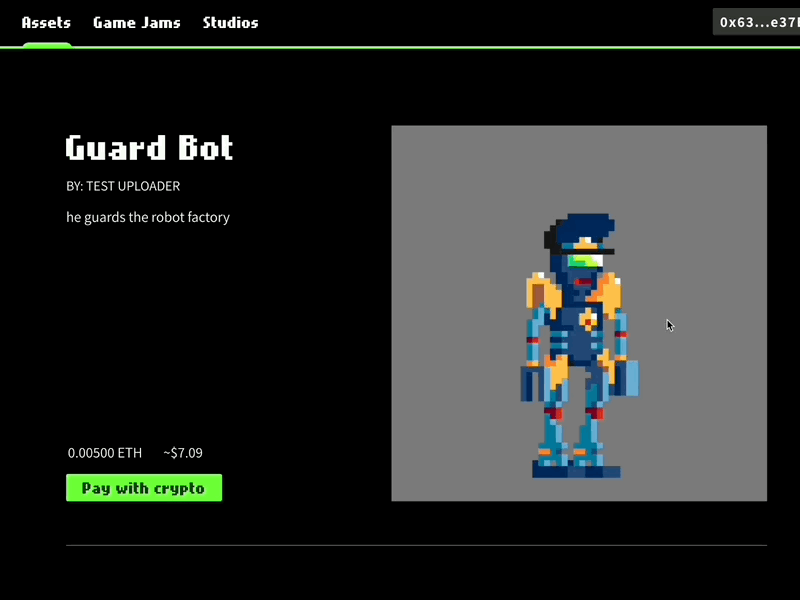
You will now be in a new window after setting up the media upload. Next you will enter the price of the media.
The price defaults to $30USD in ETH or MATIC depending on the chain you're connected to. This price can also be displayed in Gwei for either asset class (in dropdown menu).
Click the box next to the ETH/Polygon symbol to set the price in the cryptocurrency. The dollar price will be updated when you click Done.
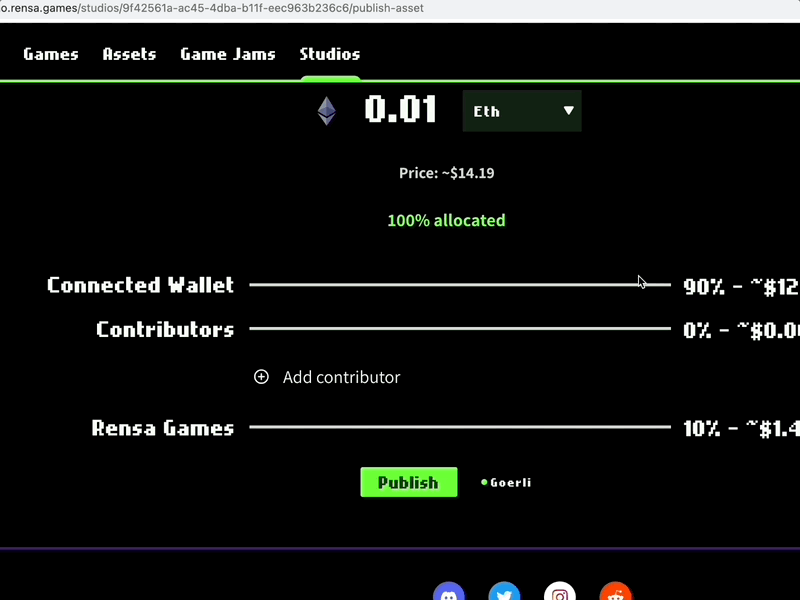
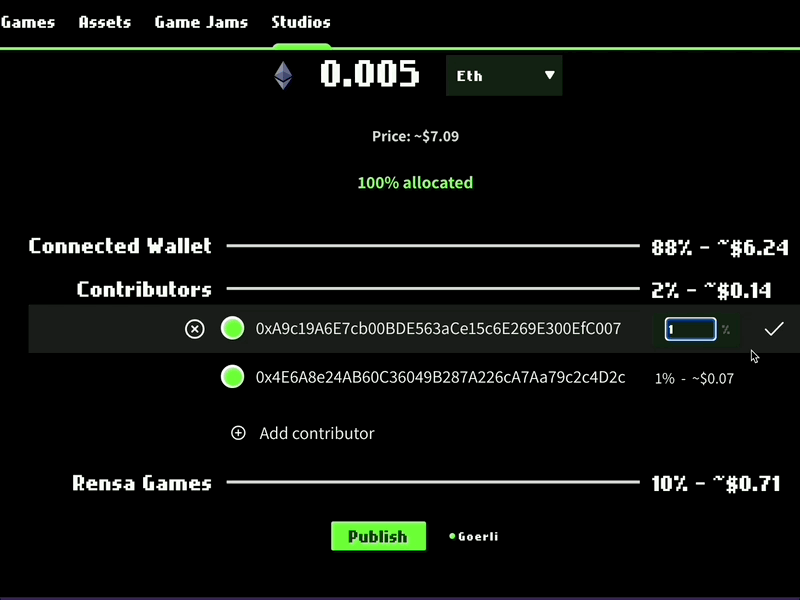
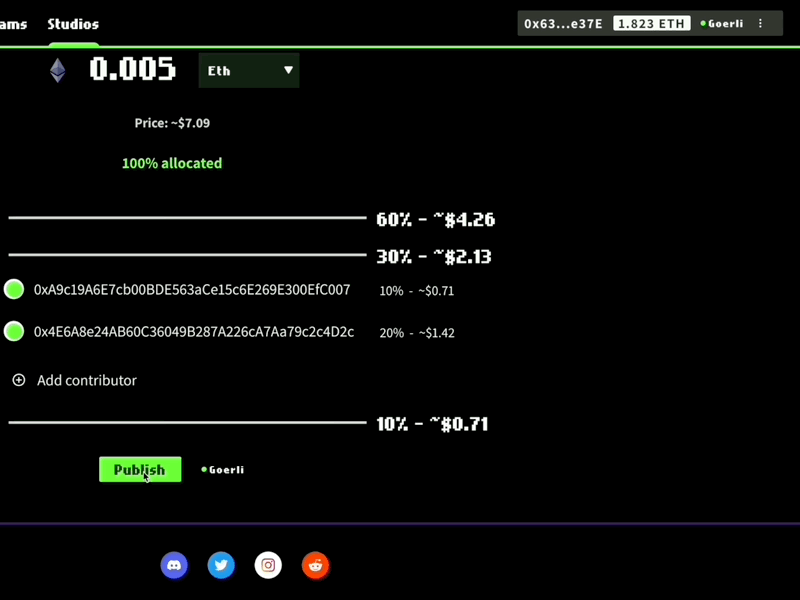
Profit Distribution
When a developer or content creator uploads a game or digital media through the Rensa portal, they will have the opportunity to designate digital wallet addresses to receive revenues or royalties, along with the percentage of the total sale they should receive.
All revenues from sales will be received in real-time (within the block time of Ethereum or Polygon) to the designated wallets when the game is sold. Rensa assesses a 10% platform fee at each point of sale – no charges at onboarding or upload. The remaining 90% is available to assign to project contributors as appropriate.
The platform automatically populates the connected wallet as the main wallet with 90% allocation of revenues from sales. When other wallets are added, the platform will remove revenue allocation from this wallet. The window will show the percentage allocated, and will not let you proceed if percent is above or below 100%.
To add more wallets, click the + button, copy/paste the address into the field, then click Add.
To modify the revenue allocation to a wallet, click the % field next to the wallet to change the percentage allocated, then click the check mark to make the change.
Add more wallets and modify allocations as needed. Once finished you can move on to Publish.
NOTE: Rensa charges a 10% platform fee at each point of sale. So if a developer uploads content for $10, that developer (assumed to be a single individual) will receive $9, while Rensa will receive $1, at the point of sale. We do not charge any platform or transaction fees during onboarding or at the point of upload.
Mint
When you’re ready to publish the media, click the Publish button.
A Metamask pop-up will appear to confirm the transaction. Click the button to confirm, and wait for the transaction to complete.
This transaction creates a token indicating that you are the publisher of the media (the asset owner token, or AOT) as well as the tokens that represent licenses to use your media.
FAQ: Why is there a fee to mint?
For transparency, gas fees are paid for by the game uploader at time of upload, and by content purchasers at the point of sale (in addition to the purchase price). Gas fees are paid into the Ethereum / Polygon networks, and are not received by any party transacting through Rensa.
Confirmation
Once your transaction has processed on-chain, a pop-up will appear with a link to the Etherscan or Polygonscan block explorer. You can review the progress of your transaction on that site, or wait for confirmation from Rensa.
Once the upload is complete, you can go to the Rensa Marketplace and see the media there.